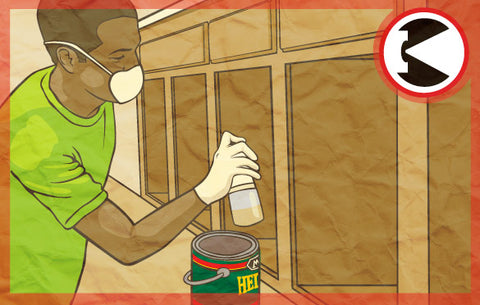
You can spruce or touch-up your stained trim and molding using your Preval Sprayer and Sherman-Williams Minwax® products.
It won't take as much time as you think. The Preval system sprays evenly over any surface, so feel free to prep and spray multiple areas at once.
See our Preval Spray Painting Tips for advice on touching up any surface in your home.
Materials You'll Need
![]() Respirator or painting mask
Respirator or painting mask
![]() Painters tape
Painters tape
![]() Rubber gloves
Rubber gloves
![]() Rags and drop cloth
Rags and drop cloth
![]() Finishing pad or steel wool
Finishing pad or steel wool
![]() Dust brush or vacuum
Dust brush or vacuum
![]() Denatured alcohol or lacquer thinner
Denatured alcohol or lacquer thinner
![]() Sponge brush or a Preval Sprayer
Sponge brush or a Preval Sprayer
![]() Color-Matched STAIN Coat:
Color-Matched STAIN Coat:
MINWAX® GEL STAIN (2493)
MINWAX® HELMSMAN® 350 VOC SPAR URETHANE (2494)
MINWAX® HELMSMAN® SPAR URETHANE (2495)
![]() POLY Coat:
POLY Coat:
MINWAX® HIGH-BUILD POLYURETHANE
MINWAX® POLYCRYLIC® PROTECTIVE FINISH
ALL SURFACE ENAMEL LATEX BASE (2418)
TIPS
- Clean your cabinet surface before you start painting! The stain will take best to your dirt-free surface.
- Use an even 1:1 mix of lacquer to lacquer thinner in your Preval sprayer.
- Thinking of re-working a small section? Take our advice and retouch the entire piece of trim. It's easier.
- Hold your Preval Sprayer about 6-10” away from the trim when spraying, unless you're working with a lacquer or quick-drying finish.
- As you know, stain can start a fire! Be mindful of any sparks or open flames near your work area. Keep your rags and stain containers in mind - and out-of-the-way - too.
Preparation:
- See any flaking polyurethane on your soon-to-be-spruced-up surface? Lightly sand the area to remove the flaking.
- Make sure to clean your surface thoroughly with a brush or vacuum.
- Remove any nearby hardware. Or you can tape over it.
- Tape vinyl windows and doorways too.
- Thoroughly tip and stir your can of stain to mix the contents.
- Time to pour the stain into the Preval bottle!
- Attach your Preval Sprayer to the bottle and screw it on snugly.
- You're ready to go!
Application:
- Pass the Preval Sprayer evenly over the area to be stained, only slightly past the edges. This helps avoid overspray!
- Apply 2-3 light coats of stain to your surface.
- Clean your Preval Sprayer by spraying through the unit with lacquer thinner.
- Time for a well-deserved break! Your stain needs to dry overnight.
- It's day 2! Continue by pouring MINWAX® or other lacquer with a matched gloss into your Preval spray bottle.
- Now mix 1 part lacquer with 1 part lacquer thinner in your Preval bottle.
- Keep your spray technique from yesterday! Time to apply three even coats of lacquer to your newly-stained area.
- You've made it. Time to remove your tape and re-attach any hardware.
- A quick spray through the Preval Sprayer with lacquer thinner will clean it out. It's ready to go for next time.
Disclaimer: The Preval How-To Articles like this one are for informational purposes only and are intended to provide general guidance. Because products, materials, techniques and building codes vary, and federal, state, municipal laws and ordinances are continuously changing, C.A Acquisitions LLC, Chicago Aerosol and Preval assume no responsibility for the accuracy of the information contained herein and disclaim any liability for omissions, errors or the outcome of any project. It is the responsibility of the reader (you) to comply with all appropriate laws, manufacturers' guidelines and rules and regulations for any project or product used. Take all safety precautions and exercise caution. Follow the MSDS warning for every product or paint you use to complete the project. If you HAVE ANY QUESTIONS OR DOUBTS IN REGARD TO ANY ELEMENT OF A PROJECT, PLEASE CONSULT A LICENSED PROFESSIONAL.